A push-in connection can look complete while a square cut, tube OD or support problem leaves a slow leak. This guide answers how to install a pneumatic pipe connector so the joint remains serviceable in an automated air line. The method follows the connector drawing, not a universal insertion depth or pressure claim.
Ыкчам жооп: isolate energy, verify the tube outside diameter and thread, cut the tube square, deburr and clean it, push it fully home, support the bend, then perform the specified leak check. ISO 4414:2010 provides system-level pneumatic safety guidance; the fitting supplier’s instructions control the component limits.
What should be checked before installing a pneumatic pipe connector?
Match tube OD, material, wall tolerance, connector seal and port thread. Inspect the tube for ovality, scratches, oil or chips. Confirm the circuit medium, pressure, temperature, vibration and access. Never substitute a nominal “inch” size without a drawing.
How do you cut and seat the tube correctly?
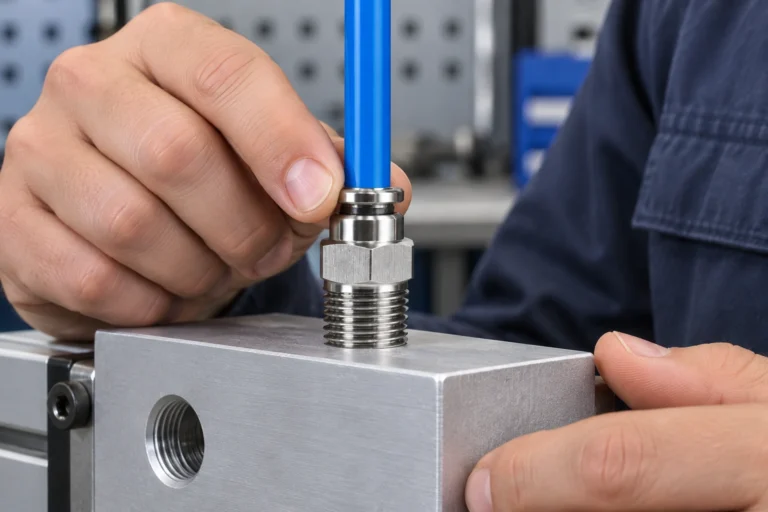
Lock out and exhaust stored air. Use a sharp tube cutter to make a square, uncrushed end. Push the tube straight through the collet to the documented stop, then make the permitted pull check. Keep side loads off the fitting and respect the tube bend radius.
How can installers prevent leaks after assembly?
Support tubing near elbows, protect it from abrasion and leave release-collar access. Inspect every joint, then use the approved pressure or leak test. A visual check finds skewed tubing but does not prove tightness. Record part reference, tube, thread, seal and test result.
| Текшерүү | Кабыл алуу далилдери |
|---|---|
| Труба интерфейси | Measured OD, material and undamaged square end |
| Port | BSPP, BSPT or NPT confirmed from drawing |
| Assembly | Full insertion, support and no side load |
| Test | Site-approved leak/pressure result recorded |
When should a connector be removed instead of reused?
Remove it when the collet, seal or body is damaged, the tube has scored the sealing area, or the manufacturer prohibits reconnection. A reusable joint still needs a fresh, square tube end and a documented inspection.
What do ISO 4414 and ISO 12100 add to installation planning?
ISO 4414:2010 addresses safe pneumatic system design and stored energy; ISO 12100:2010 frames machinery risk assessment. Neither replaces the connector drawing or site acceptance procedure.
What is the installation checklist?
- Isolate and exhaust energy.
- Verify OD, thread and service limits.
- Cut square, clean and inspect.
- Insert fully and support routing.
- Test, document and label the circuit.
See the пневматикалык бөлүктөрдүн ассортименти, Тейлөө боюнча нускама жана thread matching guide. ANMASPC/Oulu can provide drawings for the selected configuration.
Көп берилүүчү суроолор
Can a push-in fitting be installed on an angled cut?
No. Re-cut the tube square.
Should thread type be guessed from size?
No; verify BSPP, BSPT or NPT.
Is lubricant always required?
Only when the connector and tube instructions permit it.
How is insertion verified?
Use the documented stop or mark and the permitted pull check.
Can a leaking tube simply be pushed harder?
No. Depressurize, inspect and correct the cause.
When is replacement mandatory?
When seals, collets, body or tube are damaged or reuse is prohibited.
Деректер
- ISO 4414:2010, Pneumatic fluid power—General rules and safety requirements.
- ISO 12100:2010, Safety of machinery—Risk assessment and risk reduction.
- Supplier installation drawing and current product datasheet.
Жыйынтык
A connector holds when interfaces, preparation, seating and routing are treated as one assembly. Confirm the tube and thread first, make a clean square cut, seat to the supplier’s instruction, then test under the site method. Do not skip isolation or assume a visual inspection proves leak tightness. ANMASPC/Oulu’s pneumatic parts range can support a documented selection, but the exact drawing and service limits remain the decision record.